|
  

Cabin Steps
Running Total Hours:
0.0
 | 2006.09.17:
(1.0) With the fuselage now
off the ground, I finally have access to fix a defect that's been
nagging me since I first received the fuselage from Van's. The
skin has a conical curvature in the area where the cabin steps
penetrate the fuselage. At the vertex of the cone, the skin has
a very tight bend radius and therefore is under considerable
stress. Although a relief hole is called out, it is very common
for a stress fracture to develop from the vertex. I've observed
this on many flying RV's, and mine is no exception. When I
inspected the fuselage after receiving it from Van's I noticed a small
crack emanating from the relief hole on the starboard side.
Since the crack was still very small, approx 1mm in length, I decide
not to drill a stop hole, but rather just enlarge the hole slightly
beyond the edge of the crack. Taking inspiration from my
dentist, I put a small grinding bit in my Dremel and went to
work. As best as I can tell, it worked. I enlarged the
hole, deburred it nicely with a needle file, and no longer see any
sign of a crack. Now time will tell. If ever a crack does
develop again, I'll reconsider stop-drilling. |
| 2006.09.18:
(1.0) Upon closer
inspection, I noticed tiny cracks in the same place on the port side
as well. Gave it the same treatment.
With that out of the way, I can start actually working on the cabin
steps. I marked the 1.5" diameter nominal cutouts on the
skins, as well as 1.6" diameter oversized circles to help keep
everything centered if I have to enlarge the holes slightly. |
| 2006.09.19:
(1.5) Cut the 1.5"
hole in the skin for the starboard cabin step. Used a Dremel
with an 1/8" tungsten carbide cutter bit (Dremel p/n 9903) for
the initial cut, then cleaned up with a 1" sanding drum in the
air drill. Then did the same to the outboard flange of the F-623
floor rib. Note that the clearance holes are not really circular
because the skin and ribs are not quite at a right angle to the step's
torque tube. The holes have to be made slightly oblong fore-aft. |
| 2006.09.20:
(2.0) Did the same as
yesterday for the port side. Then removed material from the
inboard flange of the F-623 floor rib. The Dremel was too wide
and short to reach through the hole in the skin, so I used the 1"
sanding drum in the air drill all the way. The "neck"
of the air drill is long and slender enough to reach through the hole
in the skin, and this worked well. |
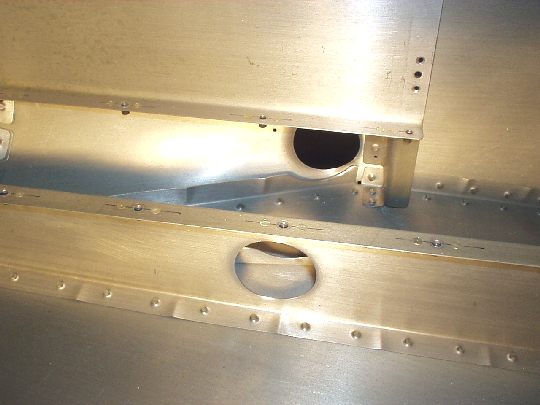
| 2006.09.30:
(3.5) Cut the clearance
holes through the F-725 baggage ribs using a hole saw through the hole
in the skin. I had to use a Harbor Freight 90 degree drill
adapter that I had laying around, not because I needed the 90 degree,
but because it was the only way I could the hole saw in there.
My air drill is narrow enough to get through the hole in the skin, but
its chuck is too small for the hole saw. My battery powered
Makita can chuck the hole saw, but the chuck is too big to get through
the hole. Anyway. Hole saws are not the most gentle of
tools, especially when used at an angle to the material, so I
supported the rib by clamping a piece of plywood to the opposite
(inboard) side of the web. It went fine.
I then proceeded to start fitting the starboard step. First I
had to shorten the torque tube by about 3/16" (easily done using
the die grinder). I then had to enlarge the hole in the skin to
accommodate not just the tube's diameter, but also the weld fillet
where the tube joins the flange. But before enlarging the hole I
carefully marked the flange's position on the fuselage as aligned by
the tube through the 1.5" holes, and also again drew an even
larger concentric circle around the hole to help keep it centered as I
enlarge it. After enlarging it I could push the weldment all the
way in, but the flange doesn't quite conform to the skin's contour,
even in the relatively flat areas forward and along the top. So
I started adjusting the flange little by little toward a good fit with
the skin. Used a big adjustable wrench as a lever arm, which
worked pretty well. I was surprised at how easily I could shape
the steel flange while cold. I thought I might have to use a
torch to heat it up -- no need.
I then marked a hole pattern, which is slightly modified from that
shown on the plans. Specifically, I carefully repositioned the
rivets that go through the F-724 bulkhead to ensure good hole spacing
considering the flush rivets already attaching the F-724 to the
skin. So I ended up with four evenly spaced rivets in that
column instead of five. And to center that column with the F-724
bulkhead it also ended up a little forward of where Van's drawing
shows it relative to the dimensions of the flange. I then also
repositioned the aft rivet columns for even spacing. Anyhow,
Van's drawings for the step kit are ancient hand drawings that were
done for the RV-6A, and they don't exactly match the dimensions of the
RV-7A, nor the dimensions of the weldments themselves. So the
instructions and drawings are useful, but not to be taken literally. |
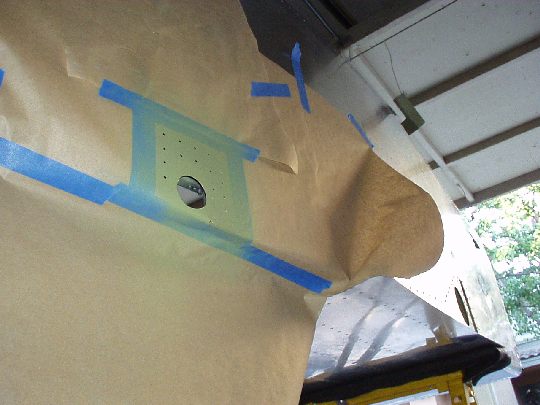
| 2006.10.02:
(2.0) Drilled the
starboard step to the fuselage using the step's flange as a drill
guide. For now I only drilled the forward holes and the top
row. I still have to finish shaping the bottom aft portion of
the flange, which is what I spent most of the evening doing.
I've seen a lot of RVs with a very poor fit in this area. It's
impossible to get a perfect fit the way the weldment is designed, but
I want to get as close as I can.
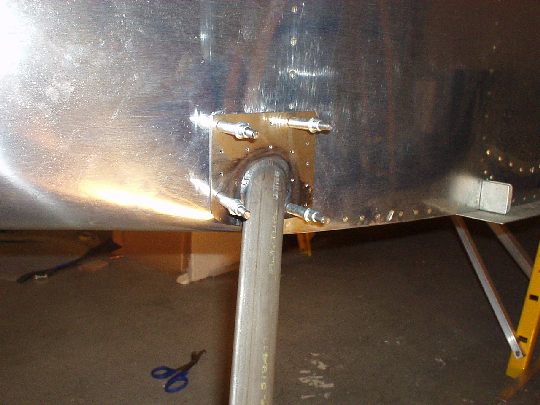
(Hard to see in the photo, but there's actually a lot curvature in
this area. Before shaping the flange, there was more than
1/4" misfit to the skin at the extremes.) |
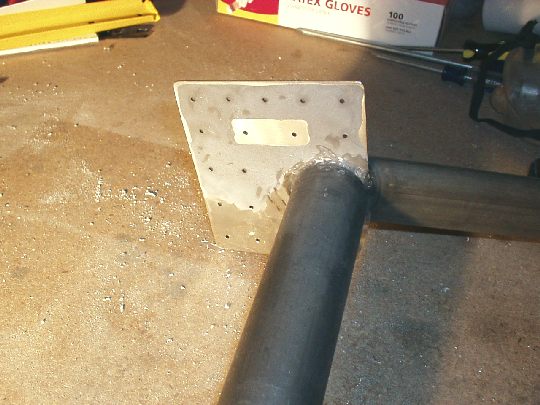
| 2006.11.14:
(16.0) [This entry
represents approximately the past 5 weeks. Being extremely busy
with my "day job" lately, work on the airplane has been
limited to an hour here and there, and I opted to spend all of that
time building rather than logging. I'll try to capture the
highlights.]
Finished shaping the flanges on both steps. The starboard step
came out pretty well with bending alone, but the port side gave me
some trouble. The curvature of the skin in that area was not as
neat as it was on the starboard side, having some concaveness toward
the F-624 vertical rib in additional to the expected conical
convexness aft. I matched the curvature as closely as I could,
but still ended up with a slight gap (approx 0.050" max) between
the flange and the skin in the center where the welded tubing prevents
bending the flange. I didn't want to attempt riveting with this
size gap in there, so I decided to shim the worst area and then smooth
over the rest with filler. I used some 0.040" 4130 chromoly
for the shim (JB Weld'ed to the flange), and JB Weld for the filler
around it. I then sanded it all down and got a very nice fit to
the contour of the skin.
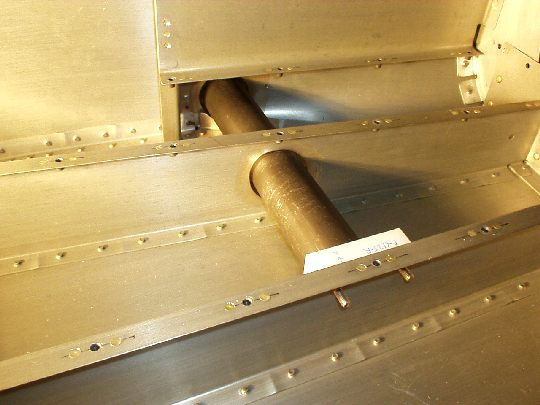
I finished drilling the flanges to the skins (temporarily to
3/32") and fitted the plastic blocks at the inboard ends of the
tubes and the F-726 ribs. I then enlarged the clearance holes
and cutaways in the F-623 and F-725 ribs to clear the tubes by at
least the thickness of a mil-spec Popsicle stick. This is to
ensure that as things twist and flex under stress, the tubes and ribs
don't touch and exert force on each other. I used the alodine
pen to treat the cutaway areas.
 |
| 2006.11.18:
(2.5) Prepping the
steps for primer. Beveled the edges of the flange for a smoother
transition to the skin. |
| 2006.11.19:
(4.0) Alodined the
skins where they'll mate with the step flanges. Sprayed AKZO
primer on the skins (the mating surfaces), the step weldments, and
miscellaneous other unrelated parts I've had laying around for a while
waiting for primer.
[Note: The apparent jaggedness of the cutout in the fuselage skin is
an artifact of resizing the photo. The hole is super smooth!] |
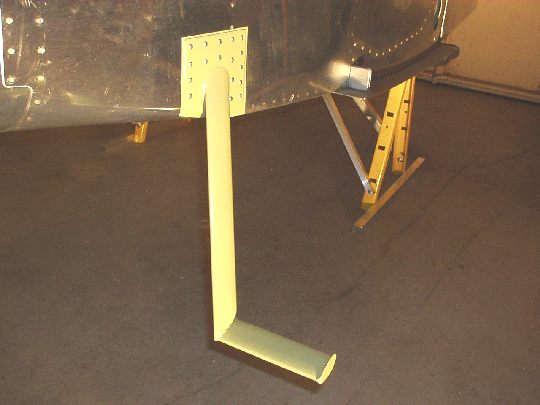
| 2006.11.20:
(2.0) Installed the
cabin steps to the fuselage. Garnet came over to help, and did a
nice job on rivet gun duty. [Garnet has been involved with
aircraft restoration for the USS Midway museum. See pictures of
a newly restored TBM Avenger here.]
I was on bucking bar duty, and had one slip that resulted in a minor
ding in the skin under the baggage floor. @#$%! Otherwise,
the steps came out really nice. I'm really happy with the fit in
all places except for the bottom aft, which I knew I wouldn't be able
to fit perfectly. Will deal with that later using filler.
 |
|
|
